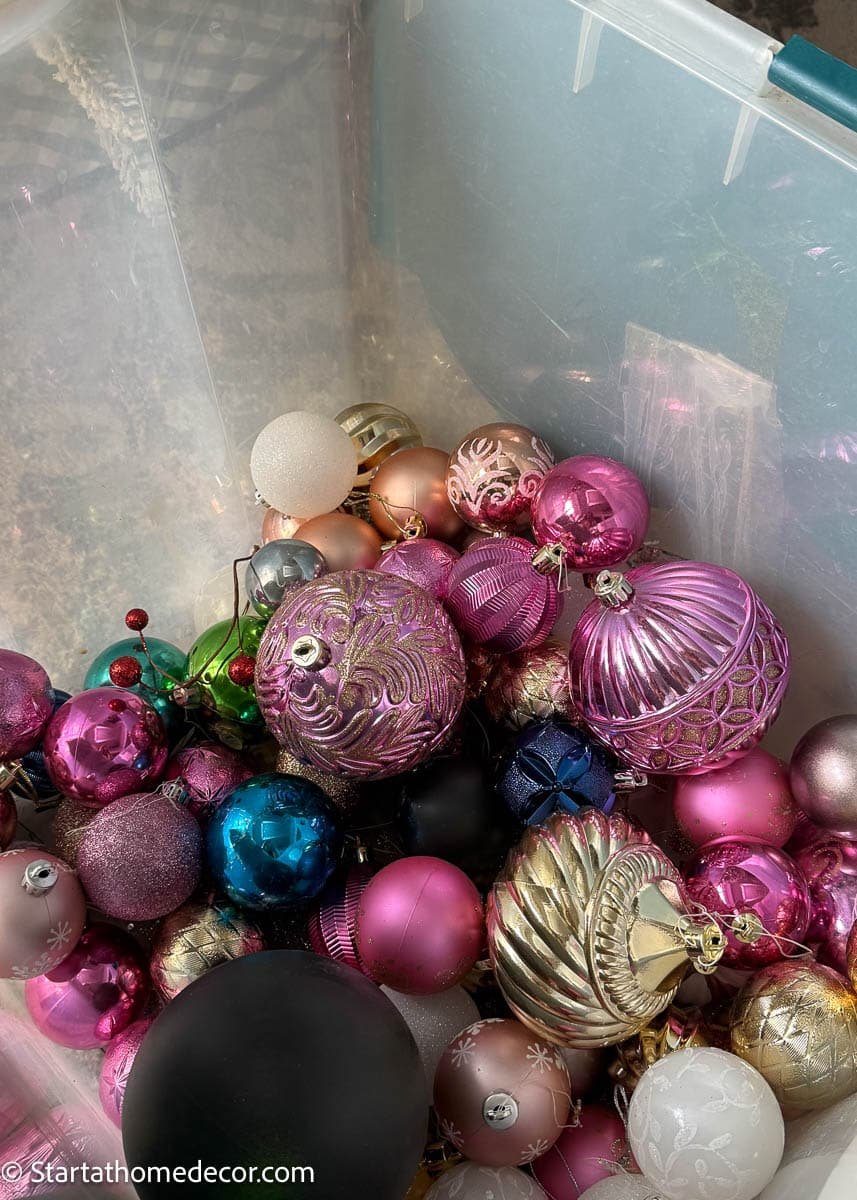
There’s one thing so magical about giving outdated Christmas ornaments a brand-new life. As an alternative of shopping for all new designer units (as a result of… $$$). You’ll be able to take these outdated ornaments sitting in your storage bins, or seize a number of low-cost ones from the Greenback Tree. Then flip them into high-end, textured beauties that look straight out of a boutique vacation store.
If you happen to love impartial, matte, designer-styled Christmas décor, that is the best DIY to do this season.
Provides You’ll Want
Step 1: Collect Outdated or Greenback Retailer Ornaments
You should utilize any ornaments you have already got. The shinier and extra outdated, the higher! If you happen to want extras, the Greenback Tree, Walmart, or any clearance bin is ideal for locating cheap choices that remodel superbly with paint.
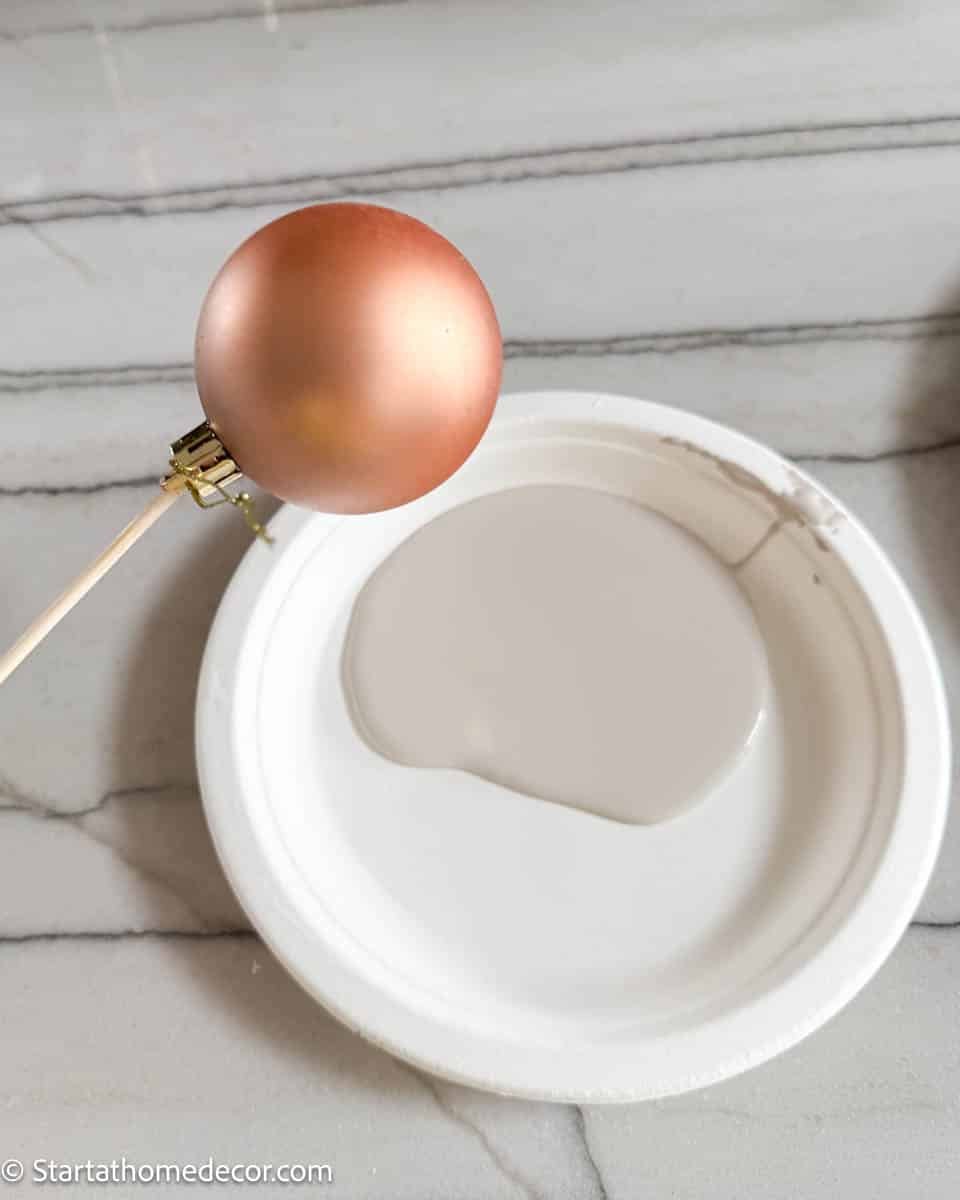
Step 2: Prep Your Ornaments on Skewers
Push every decoration onto a wood skewer or dowel. This makes portray so a lot simpler and offers you full management with out smudging the end.
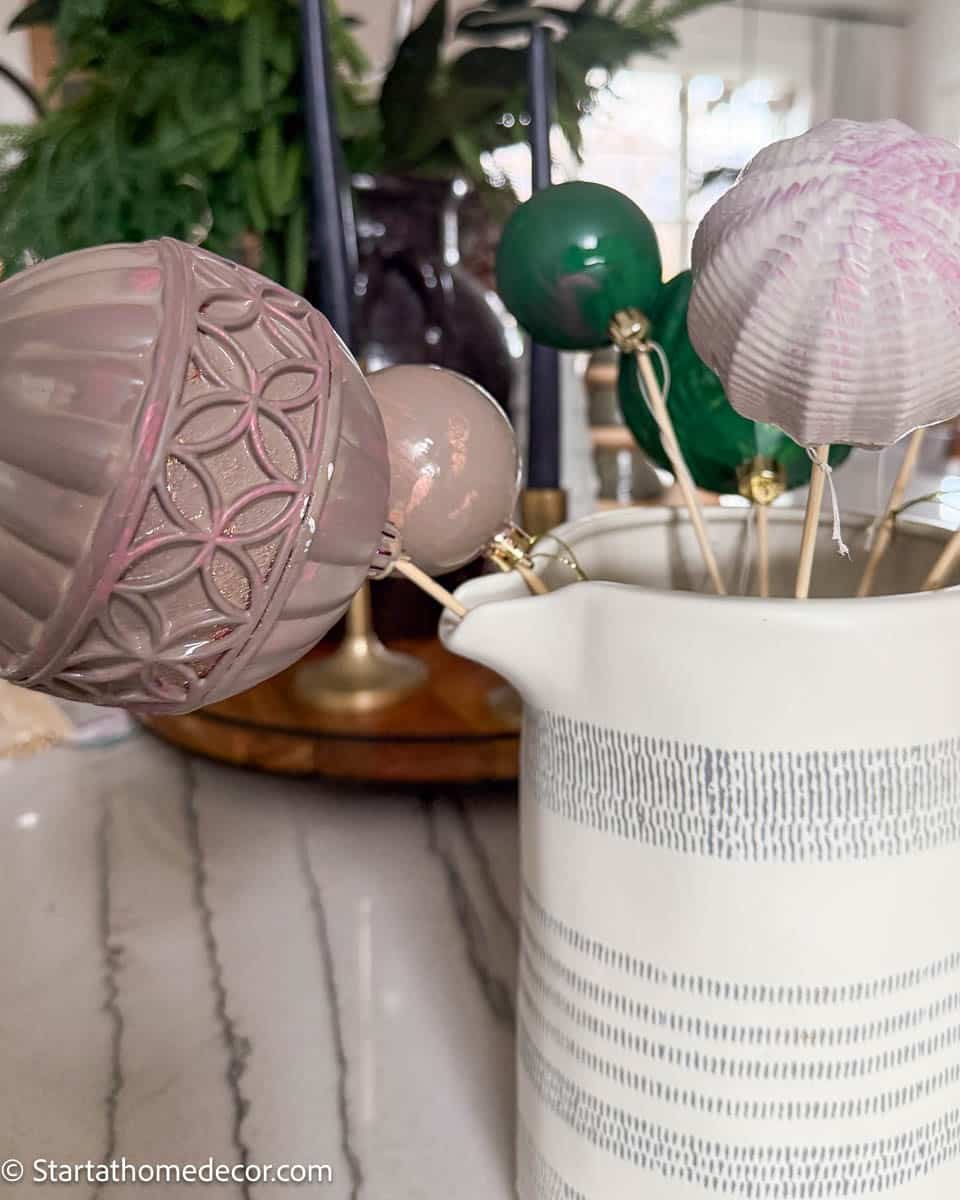
Stick the skewers into the pitcher or foam or a cardboard field so your ornaments can stand upright whereas drying.
Step 3: Paint with Chalk Paint — 3 Coats
Chalk paint works greatest as a result of it grips the decoration floor and offers that matte, designer-looking end.
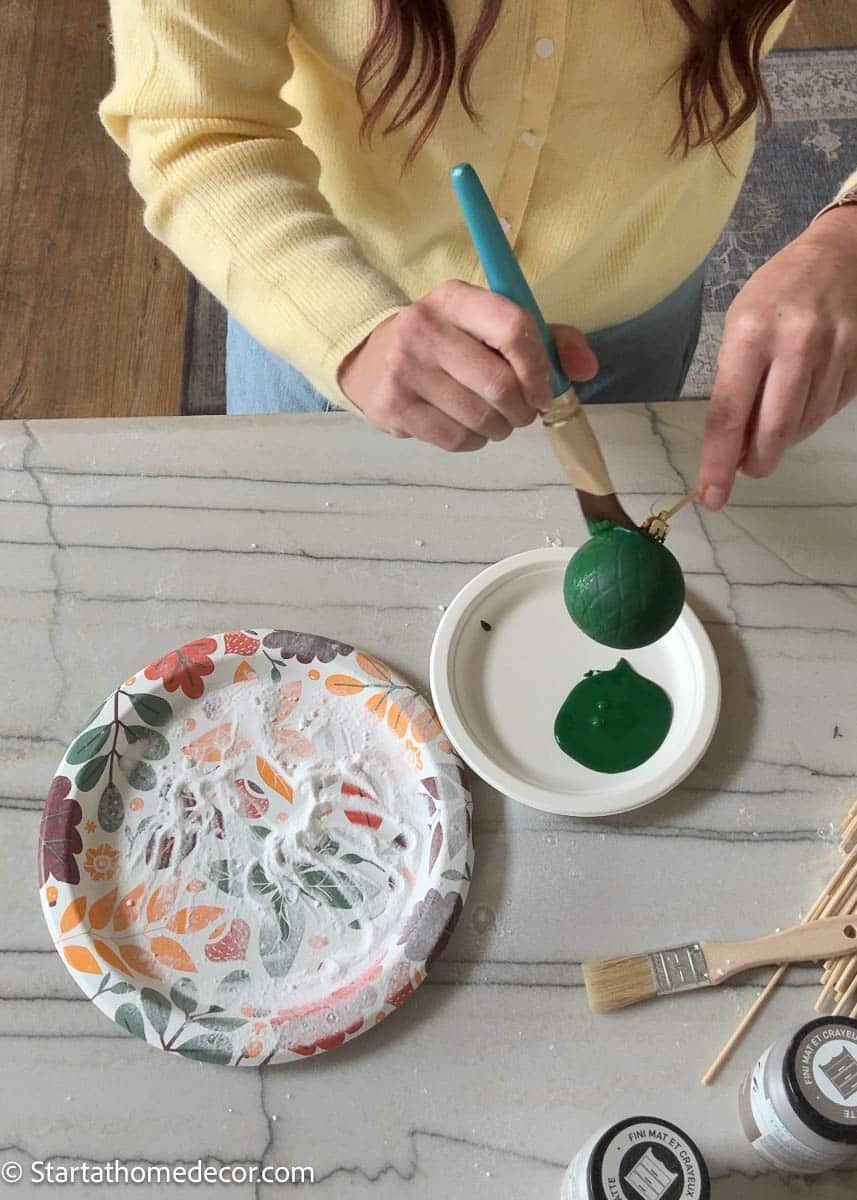
- Paint the primary coat and let it totally dry.
- Add the second coat and let dry once more.
- For the third coat, don’t let it dry — that is the place the magic occurs!
I used three coats for the proper end, however you’ll be able to add extra if you need further texture.
Step 4: Whereas the Final Coat Is Moist… Sprinkle Baking Soda
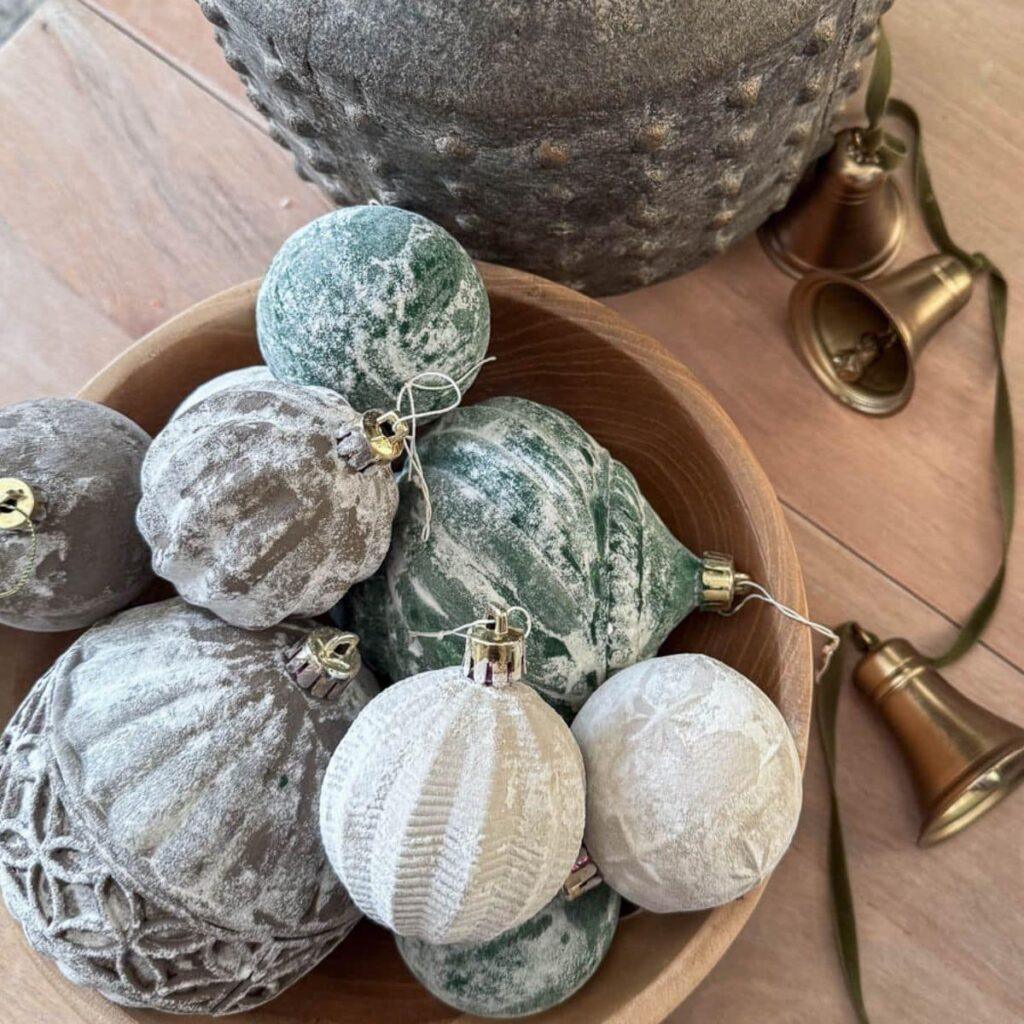
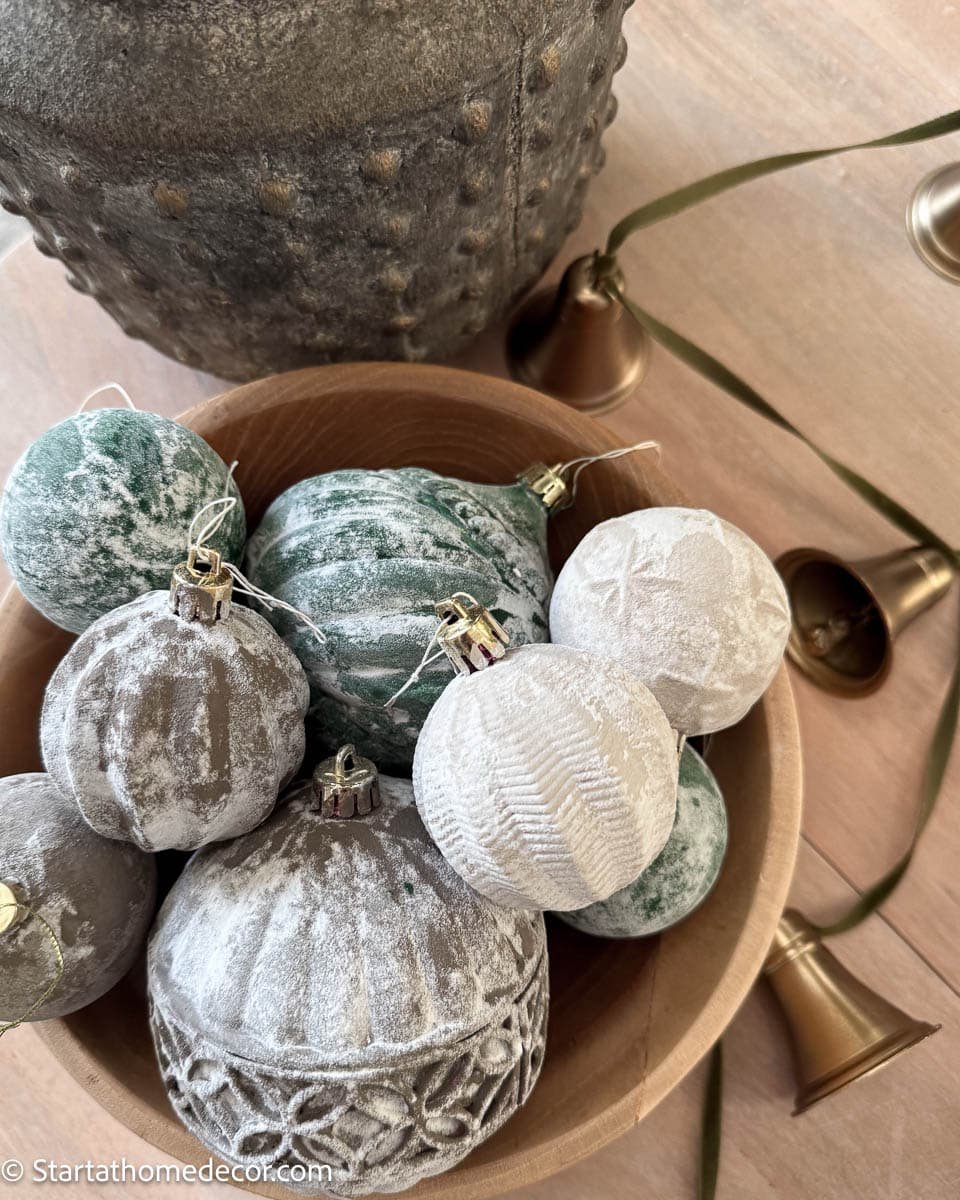
Earlier than the ultimate coat dries, evenly sprinkle baking soda proper onto the moist paint. You’ll see the feel begin to type immediately! Blow the additional baking soda off.
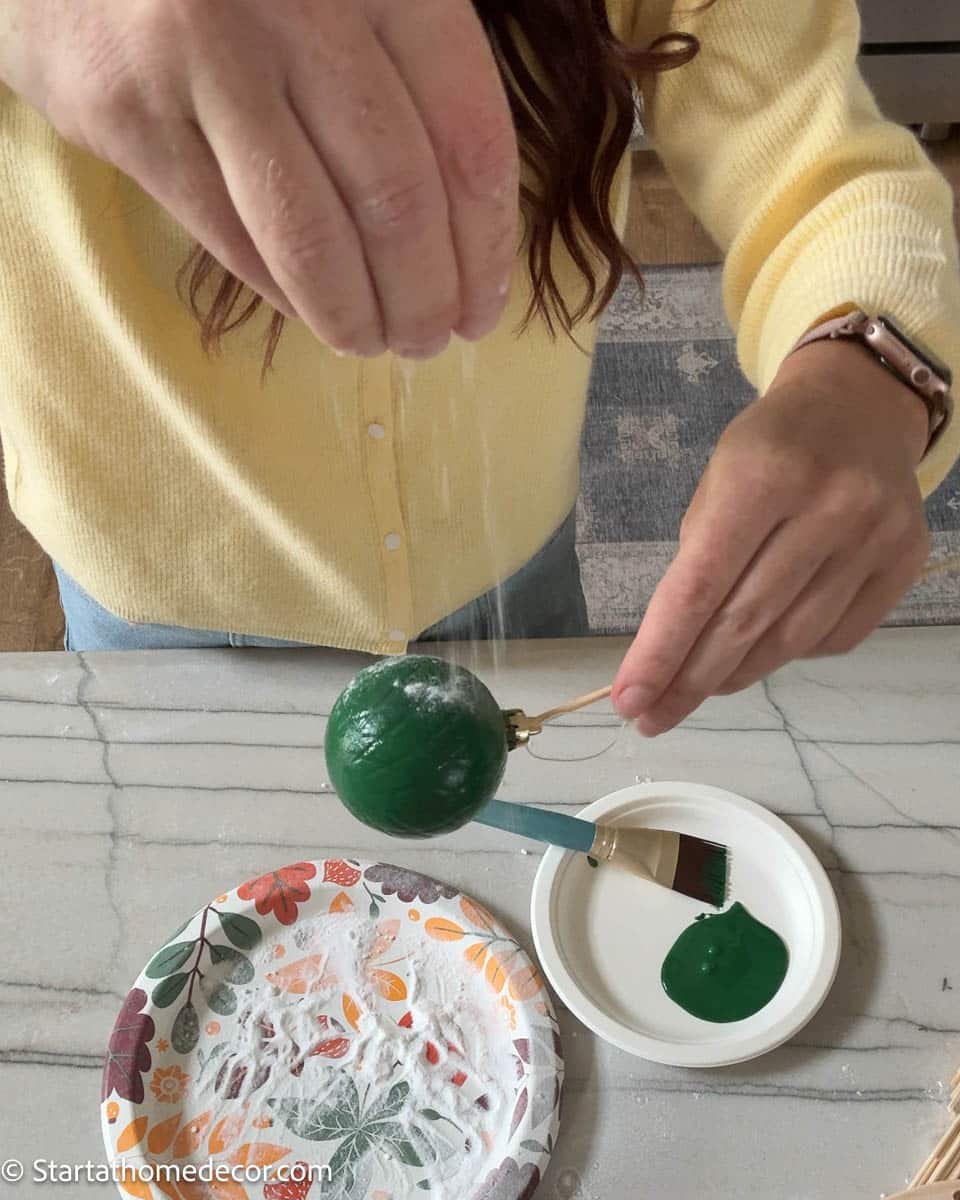
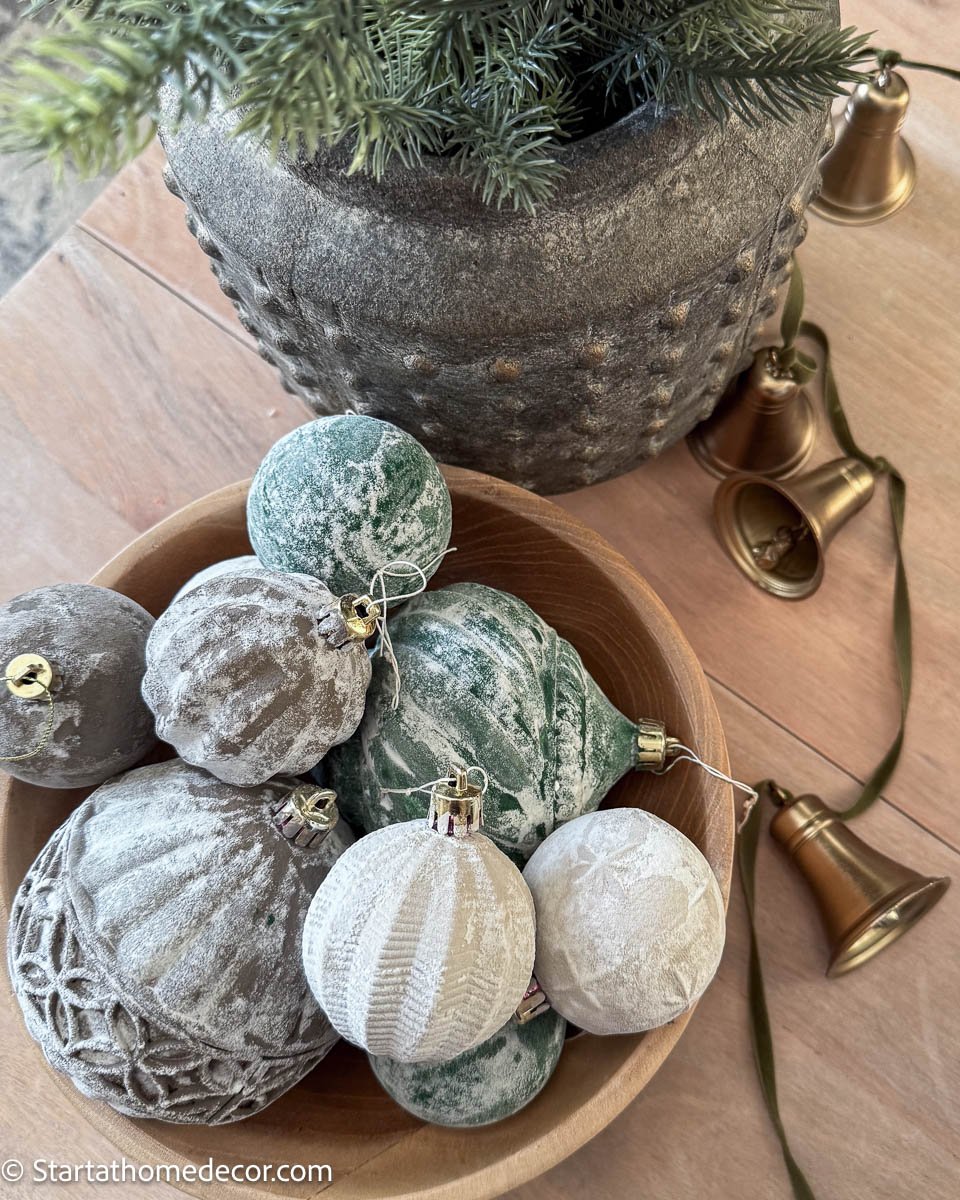
This creates that high-end, ceramic-style, old-world designer look that’s been throughout Pinterest recently. The feel is gentle, refined, and so lovely on a Christmas tree.
Let the ornaments keep on the skewers till they’re fully dry.
Step 5: Non-obligatory — Seal for Longevity
In case your ornaments will get numerous dealing with otherwise you need them to final for years, spray them with a matte clear topcoat as soon as totally dry. This helps shield the paint and retains the baking-soda texture intact.

Fashion Your New Designer Ornaments
As soon as they’re prepared, add them to your tree, bowl fillers, garlands, or wreaths. They appear particularly beautiful in impartial, Scandinavian, farmhouse, or fashionable vacation décor — and nobody will ever guess they began out as outdated, shiny ornaments.

That is really one of many best Christmas DIYs, and it transforms primary ornaments into one thing that feels {custom} and high-end.
If you happen to’re already portray ornaments, listed below are a number of extra methods to raise outdated or cheap items and provides your tree a {custom}, high-end look.
- Rub-and-Buff is AMAZING if you desire a gentle, aged metallic end with out the cruel shine of conventional spray paint.
- Add Ribbon Tails for a Boutique Look. Use velvet, satin, or gauze-style ribbon for optimum impression.
- Add in stems and ribbon as fillers.
The Magic of Easy, Designer-Impressed DIYs
Creating designer-inspired ornaments doesn’t should be costly — typically all it takes is slightly paint, a sprinkle of baking soda, and a contact of creativity. Whether or not you’re refreshing outdated ornaments, including a gentle metallic rub-and-buff end, or styling your tree with new textures and ribbons, these easy DIYs deliver a lot persona and appeal to your vacation decor.
I hope this evokes you to have a look at your outdated Christmas bins with contemporary eyes and remodel them into one thing lovely. Have enjoyable crafting, benefit from the magic of the season, and let your tree shine in its one-of-a-kind, custom-designed model!
Blissful DIY-ing
Brooke