Cleansing up the drywall after eradicating this easy wall therapy took SO for much longer than I believed! Fortunately it was price the entire work in the long run.
I’ve a knack for considering two ideas (that come again to chunk me) once I begin a DIY venture. The primary is “This is not going to take lengthy,” and the second…”This one goes to be straightforward.”
Often I am very incorrect — you’d assume I’d study. I have discovered to not say “That is going very well.” 😂

The horizontal strains have been too busy on this room and I knew they wanted to go.
I figured there could be some harm to the wall once I obtained all of it down, but it surely was means worse than I believed.
Eradicating the precise trim was straightforward. First, I scored alongside any caulk with a razor blade — alongside the partitions or any trim:

This put up might comprise affiliate hyperlinks to your comfort.
I’ll earn a small fee when you make a purchase order via hyperlinks.
Should you do not do that, it might pull up paint on adjoining surfaces as you pull the trim away.


Doing that 800 occasions was tremendous enjoyable! That is in all probability an exaggeration, but it surely felt prefer it. It took ceaselessly to seek out all of them — I’d wipe my hand over the wall to seek out nails that have been nonetheless poking out.
Subsequent, I needed to tackle the strains of paint that have been dried up on the wall:

I could not determine why these have been solely above me on the wall, after which I remembered that I touched up the underside edge of each piece with paint after I put in the shiplap.
Sooooo I had quite a few strains with raised, dried paint that I needed to tackle. I used the identical flat painter’s device and scraped it throughout these areas to take away it:
 |
| A few of these holes have been from hanging objects properly earlier than the shiplap. |
Which created a bit extra drywall harm, however I’d moderately have that than the plain strains. This was solely on the highest half of the wall.
That is why I by no means use glue on my wall molding tasks! The drywall harm would have been a lot worse.

Fortunately this was the simplest half. For almost all of the holes, only a fast swipe was wanted.
For areas that had deeper harm the place the highest layer of drywall was eliminated, I used the flat steel device to unfold it evenly throughout. As soon as dry, I used a moist sanding block to knock down the larger spots (sanding whereas damp helps to chop down on drywall mud).
For the nail holes I simply used a moist rag to wipe away any extra:

I wiped down the entire wall after which…lastly!…it was time to color!
The blue paint shade (known as Whitestone) on the shiplap and different partitions had a purple forged on this room a lot of the day. Once I held it as much as the wallpaper, it seemed like an awesome match, however the low pure mild on this room modified the colour on that wall.
I began trying into hotter paint colours, after which realized I had loads of the Pachyderm paint from our eating room leftover:

I LOVE this shade — it is such a beautiful, heat impartial.

So I went for it! I wasn’t so certain earlier than it dried, however later that evening I completely cherished it!:


It took completely ceaselessly to take away the entire base…I used to be positively questioning my choices at this level.
Putting in baseboards aren’t tough, however the ending strategy of filling holes, caulking and portray takes ceaselessly. It is simple work, however time consuming for certain.
Each time I replace our baseboards to this taller (1×6 trim with easy shoe molding) model, I say I am by no means doing it once more. However then I adore it a lot I am unable to wait to start out the subsequent room!:

Taller baseboards aren’t at all times a brilliant apparent change, however they make a room really feel increased finish general.
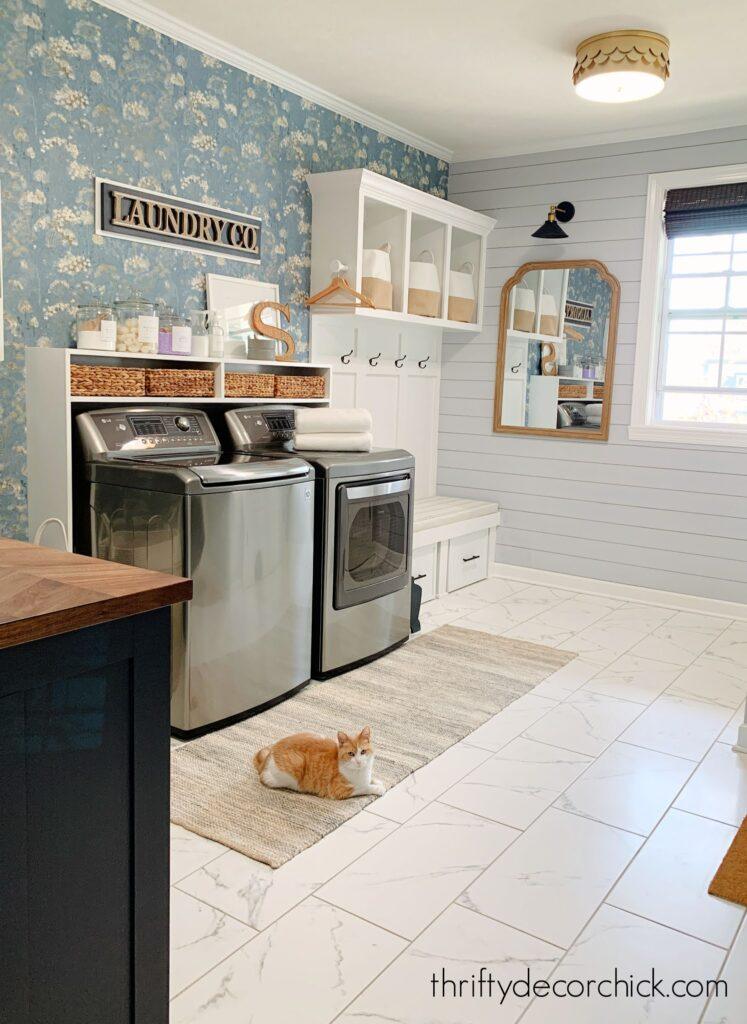
Here is my progress to date, with the shiplap strains gone, new tall baseboards and the entire partitions painted within the heat Pachyderm paint shade:
These DIY tasks took me a complete of eight days, however they have been properly price it. (I can say that now.)
I’ve a number of extra updates I am engaged on, however to date so good!:

Now the wallpaper wall is the star, and the remainder of the room is far calmer and soothing. I like how the trim pops now!
I did not anticipate these tasks to take so lengthy, however the remainder of the updates must be simpler. (I in all probability should not have stated that.)
Have you ever ever eliminated trim and repaired drywall after a wall therapy like this?