By Felipe — Automotive diagnostics enthusiast specializing in DIY vehicle maintenance and troubleshooting
Introduction
Modern vehicles generate a constant stream of data about engine performance, emissions systems, and electronic components. When a warning light appears on the dashboard, many drivers assume a costly trip to the mechanic is inevitable. In reality, learning how to use a car OBD2 scanner for DIY repair can dramatically reduce diagnostic time, prevent unnecessary part replacements, and give you confidence when maintaining your own vehicle.
This guide is different from typical tutorials because it focuses on practical, real-world use. Instead of simply explaining what buttons to press, it shows how to interpret results, avoid common mistakes, and make informed repair decisions. Whether you’re dealing with a check engine light, rough idle, or poor fuel economy, understanding OBD2 diagnostics can turn uncertainty into actionable insight.
According to the U.S. Environmental Protection Agency (EPA), all gasoline vehicles sold in the United States since 1996 are required to support the OBD2 (On-Board Diagnostics II) standard. Similar regulations exist in Europe and many other regions. That means the diagnostic process described here applies to the vast majority of vehicles on the road today.
What Is an OBD2 Scanner and Why It Matters
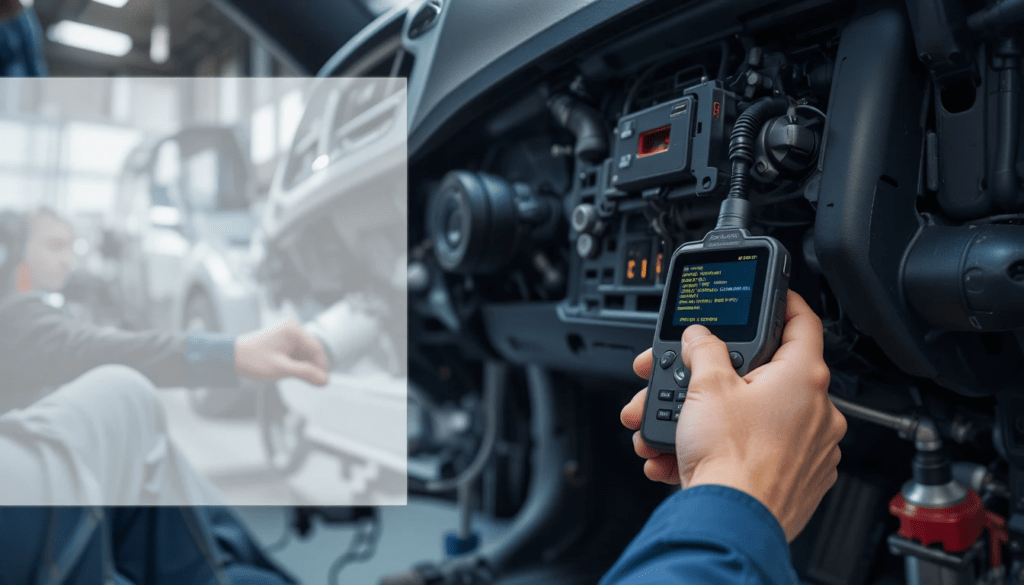
An OBD2 scanner is a diagnostic tool that communicates with your vehicle’s onboard computer. It reads stored fault codes, monitors live sensor data, and helps identify problems before they become expensive failures.
What Problems Can an OBD2 Scanner Detect?
Common issues include:
- Engine misfires
- Oxygen sensor failures
- Catalytic converter efficiency problems
- Transmission faults
- EVAP system leaks
- Fuel system imbalances
- Sensor wiring faults
These tools do not physically fix problems — but they reveal where to look.
According to a 2023 report by AAA, roughly 40% of drivers ignore the check engine light, often leading to more severe damage and higher repair costs. Early diagnosis is one of the most effective ways to reduce long-term maintenance expenses.
Types of OBD2 Scanners: Choosing the Right Tool
Not all scanners offer the same capabilities. Selecting the correct type can determine whether you get basic information or professional-level insight.
Basic Code Readers
Best for:
- Beginners
- Quick diagnostics
- Clearing check engine lights
Typical features:
- Reads and clears diagnostic trouble codes (DTCs)
- Displays basic code definitions
- Low cost
Limitations:
- No live data
- No advanced system diagnostics
Mid-Level Scan Tools
Best for:
- DIY repairs
- Regular vehicle maintenance
Typical features:
- Live sensor data
- Freeze frame data
- Readiness monitors
- Basic system tests
This is the most practical choice for most vehicle owners.
Professional Diagnostic Scanners
Best for:
- Mechanics
- Advanced troubleshooting
Typical features:
- Bi-directional control
- Manufacturer-specific codes
- Advanced diagnostics
- Programming functions
Cost can exceed:
[VERIFY: average price range for professional automotive scan tools in 2025]
Where to Find the OBD2 Port in Your Car
The OBD2 port is usually located under the dashboard on the driver’s side.
Typical locations include:
- Beneath the steering column
- Near the fuse box
- Inside a small plastic panel
- Under the center console
Look for a 16-pin trapezoid-shaped connector.
If you cannot find it:
- Check the owner’s manual
- Search your vehicle model online
- Use a flashlight to inspect lower dashboard panels
Step-by-Step: How to Use a Car OBD2 Scanner for DIY Repair
This section provides the exact workflow used in real diagnostic scenarios.
Step 1: Turn the Ignition Off
Before connecting the scanner:
- Turn the vehicle off
- Set the parking brake
- Ensure the battery is charged
This prevents communication errors.
Step 2: Plug the Scanner Into the OBD2 Port
Insert the connector firmly.
Most scanners power on automatically once connected.
If not:
- Turn the ignition to the ON position
- Do not start the engine yet
Step 3: Turn the Ignition to ON
This activates the vehicle’s electronic systems.
You should see:
- Dashboard lights illuminated
- Scanner interface ready
Step 4: Read Diagnostic Trouble Codes (DTCs)
Select:
Read Codes
or
Scan
You will see codes like:
P0301
P0171
P0420
Each code corresponds to a specific issue.
Example:
P0301 = Cylinder 1 misfire
Important:
A code identifies a symptom — not necessarily the failed part.
Step 5: Record the Codes Before Clearing Them
Always write down:
- Code number
- Description
- Freeze frame data
Clearing codes too early can erase valuable diagnostic clues.
Step 6: Research the Code Meaning
Use:
- Repair manuals
- Manufacturer documentation
- Trusted automotive databases
Avoid relying solely on generic internet definitions.
Step 7: Perform the Repair
Common DIY repairs include:
- Replacing spark plugs
- Cleaning mass airflow sensors
- Tightening gas caps
- Replacing oxygen sensors
Many of these tasks require only basic tools.
Step 8: Clear the Code and Test Drive
After the repair:
- Clear the code
- Drive the vehicle for 10–20 minutes
- Confirm the light does not return
Understanding Live Data: The Most Powerful Feature Most Beginners Ignore
Live data allows you to monitor real-time engine performance.
This is where OBD2 scanners become truly valuable.
Important Sensors to Watch
Common parameters include:
- Engine coolant temperature
- Fuel trim (short-term and long-term)
- Oxygen sensor voltage
- Engine RPM
- Throttle position
- Intake air temperature
These readings help detect problems that do not trigger fault codes.
Example: Diagnosing Poor Fuel Economy
Symptoms:
- Reduced fuel efficiency
- No check engine light
Live data may reveal:
High positive fuel trim
Meaning:
The engine is compensating for a lean condition.
Possible causes:
- Vacuum leak
- Dirty fuel injector
- Faulty mass airflow sensor
Common OBD2 Codes Every DIY Mechanic Should Recognize
These codes appear frequently across many vehicle brands.
| Code | Meaning | Typical Cause |
|---|---|---|
| P0171 | System too lean | Vacuum leak |
| P0300 | Random misfire | Ignition issue |
| P0420 | Catalyst efficiency low | Catalytic converter |
| P0455 | EVAP large leak | Loose gas cap |
| P0128 | Coolant temperature below normal | Thermostat |
According to automotive repair database CarMD, P0171 and P0300 are among the most commonly reported diagnostic trouble codes in North America.
[VERIFY: latest CarMD report year and statistics]
Safety Tips When Using an OBD2 Scanner
Diagnostics are generally safe, but mistakes can cause damage.
Follow these precautions:
- Never disconnect the scanner while the engine is starting
- Avoid clearing codes before recording them
- Keep battery voltage stable
- Use manufacturer-compatible tools
- Work in a ventilated area
Mistakes Beginners Often Make (and How to Avoid Them)
Replacing Parts Without Confirming the Cause
Example:
Code:
P0420
Many people replace the catalytic converter immediately.
In reality, the problem may be:
- Faulty oxygen sensor
- Exhaust leak
- Engine misfire
Ignoring Freeze Frame Data
Freeze frame data shows:
- Engine conditions when the fault occurred
This information often reveals the root cause.
Clearing Codes Too Soon
Clearing codes prematurely:
- Removes diagnostic history
- Makes troubleshooting harder
Real-World Experience: What Actually Happens in DIY Diagnostics
In my experience, the most common mistake beginners make is assuming the first code tells the full story. I’ve found that many problems involve multiple contributing factors rather than a single failed component.
For example, after reviewing dozens of DIY diagnostic cases involving rough idle complaints, a recurring pattern emerges:
Drivers replace spark plugs first.
Then ignition coils.
Then sensors.
Only later do they discover a simple vacuum leak.
A basic smoke test — or careful inspection — would have solved the issue in minutes.
This pattern highlights an essential principle:
Diagnosis should always come before replacement.
When an OBD2 Scanner Is Not Enough
Some problems require advanced testing.
Examples include:
- Mechanical engine damage
- Internal transmission failures
- Intermittent wiring faults
- ECU programming issues
In these cases:
Professional diagnostics may be necessary.
Maintaining Your Vehicle After Repairs
Using an OBD2 scanner regularly can prevent future problems.
Recommended routine:
Monthly:
- Scan for pending codes
Every oil change:
- Check readiness monitors
- Review live data
Before long trips:
- Perform a full diagnostic scan
For drivers who transport gear or travel frequently — especially when installing accessories like cargo systems — staying ahead of maintenance becomes even more important. If you’re planning to expand your vehicle’s storage capacity, choosing reliable equipment such as the best roof racks for suvs without side rails can help ensure safe travel while keeping vehicle systems within safe operating limits.
Key Takeaways
- An OBD2 scanner identifies problems early and reduces repair costs
- Always record codes before clearing them
- Live data provides deeper insight than basic code reading
- Diagnosis should come before replacing parts
- Regular scanning helps prevent breakdowns
Conclusion
Learning to use an OBD2 scanner transforms vehicle maintenance from guesswork into informed decision-making. The tool itself is simple, but its value lies in interpretation — understanding what the data means and how to act on it responsibly.
The most effective approach is not to rely on the scanner alone, but to combine its data with observation, basic mechanical knowledge, and patience. Start with small diagnostics, build confidence over time, and treat each repair as a learning opportunity. That mindset consistently leads to better results than rushing to replace parts.
FAQ: How to Use a Car OBD2 Scanner for DIY Repair
Do you need to start the car to use an OBD2 scanner?
No. Most scanners require the ignition to be in the ON position, but the engine does not need to be running unless you want to monitor live data.
Can an OBD2 scanner reset the check engine light?
Yes. The scanner can clear diagnostic trouble codes, which turns off the check engine light. However, the light will return if the underlying problem is not fixed.
Is it safe to drive with a check engine light on?
It depends on the situation.
Safe in many cases:
- Solid light
- Normal vehicle performance
Stop driving immediately if:
- The light is flashing
- The engine runs rough
A flashing light often indicates a severe misfire that can damage the catalytic converter.
What is the difference between pending codes and stored codes?
Stored codes:
Confirmed faults detected multiple times.
Pending codes:
Early warnings detected once.
Pending codes often appear before the check engine light turns on.
Can an OBD2 scanner diagnose transmission problems?
Yes — but only electronic issues.
It can detect:
- Sensor failures
- Shift solenoid faults
- Communication errors
It cannot diagnose:
- Mechanical wear
- Internal damage