The right way to add ornamental furnishings toes to cupboard toe kicks with this DIY hack!
I’ve made so many small updates to our kitchen through the years, and this easy
DIY element is considered one of my favorites!
I really like the look of furnishings toes on toilet and kitchen base cupboards — they add
a customized contact and make them look a lot dearer.
applied it. After I added trim to our end cabinet panels, I knew it
could be an ideal time attempt it out! I used to be
left with a straight edge on the edges of the cupboards that made this even simpler to implement.
You may as well add these ornamental “toes” the place your cupboards meet a wall or
one other cupboard.
As a substitute of shopping for costly pre-made toes for the cupboards, or jigsawing them out of
wooden (the jigsaw is my least favourite software…I keep away from it at prices 😂), I made
some straightforward adjustments to those wooden corbels:

This publish might include affiliate hyperlinks in your comfort.
I’ll earn a small fee when you make a purchase order via hyperlinks.
You’ll find them at most massive field {hardware} shops and sets of two of the small, medium and large sizes online.
I’ve used each the medium (7×7 inches) and the massive (ten inches) for my DIY cupboard toes tasks.
Earlier than you do something, I like to recommend eradicating the steel hanging brackets that come put in on the corbels:

The primary time I did this little hack, I solely made one minimize on the corbel on the top of our kitchen cupboards. Extra
particularly, the peak of the toe kick.
I measured from the ground to the underside of the cupboard body (or toe kick) to determine the peak of my “toes.”
I marked that measurement on the underside of the corbel and minimize it down with a
miter noticed. Then I gave them a number of coats of the cupboard paint coloration with gentle
sandings in between:

I took considered one of our kitchen cupboard doorways to the paint retailer to get a coloration matched to our cupboards.
Do you see my imaginative and prescient right here? They’re now cupboard “toes!”
This might be an excellent fast venture — simply portray and
attaching the corbels. However I did one further step that added a just a bit little bit of time.
I needed to verify no crumbs might get again behind them (it will be
a ache to scrub again there), so I added a block of wooden that closes it
off within the again.
I minimize items of scrap wooden the depth of the open area behind the
corbels, after which painted one facet the cupboard coloration:

Then I connected it to the bottom of the cupboards with a nail gun:

Wooden glue or Liquid Nails would work as nicely (so long as you haven’t any
plan to take away them!).
ensuring the depth of those again items have been proper on so the brand new toes
would meet up with the entrance of the cupboards completely.
This little addition prevents crumbs from getting behind them, and it
allowed me to safe them much more by nailing into that from the
entrance.
As a result of I did this I needed to minimize down the quarter spherical earlier than set up, nevertheless it was
value it!
To safe the brand new cupboard toes, I nailed from the facet (the place I might), from the highest
via the cupboard (proper up towards the lip of the cupboard, so you possibly can’t
even see the nail holes) and thru that little stopper piece from the
entrance.
They don’t seem to be going anyplace!:

I can attest that they do not budge — I just lately eliminated these to simplify the design a little bit bit. It was a STRUGGLE to get them out!
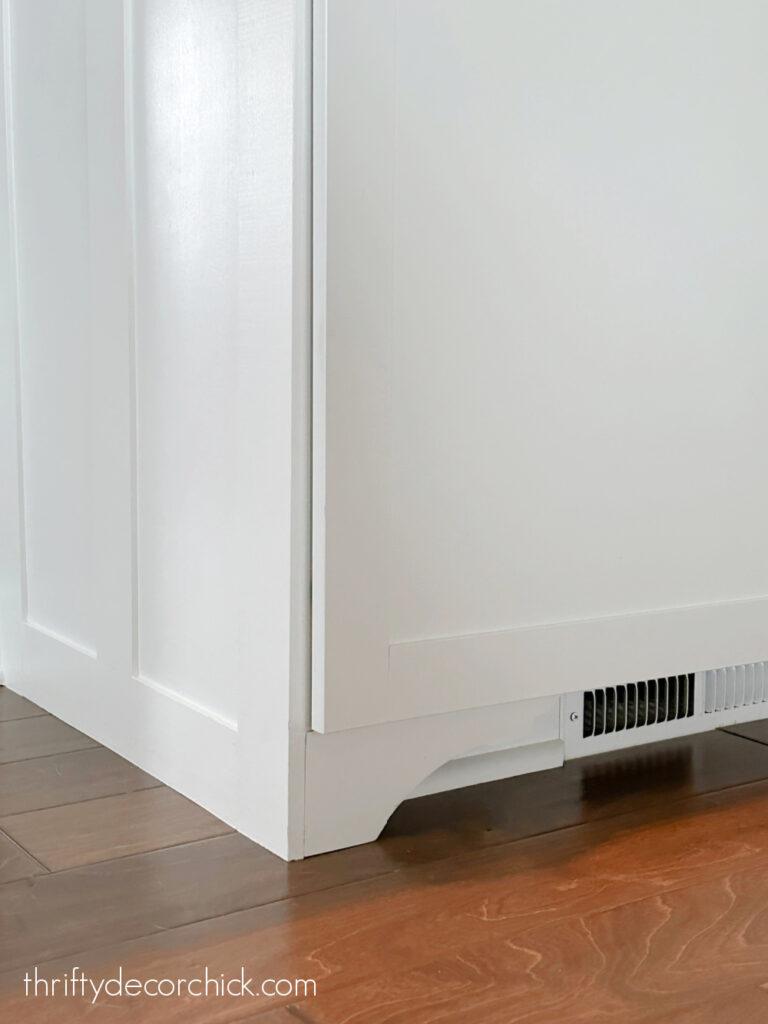
Since first making an attempt this venture, I found I like a less complicated search for these toes (that solely takes yet one more minimize). As a substitute of leaving the lengthy, curved finish of the corbel, I minimize it off for a barely extra trendy look.
The primary model entails slicing off one facet of the corbel, this time I minimize each. I used to be left with the curvy ends eliminated:


You possibly can nonetheless customise this model a bit — I minimize the mud room toes very near the curve and left a little bit size on the pantry toes.
I have been engaged on including a number of extra of those ornamental cupboard toes to our kitchen island. I just lately completed up a big makeover on the island that I will share later this week!
The ultimate element was including two extra units of those to the “working” facet of the island the place our sink and cupboards are:


This time I largely glued these — so long as the peak is cosy, the glue shall be greater than sufficient to connect them to the underside of your cupboards:


You possibly can solely see the place they meet up with the cupboard if the doorways are
open, so I did not add any ornamental trim alongside the underside to cover that
seam. If the seam bothers you, a wooden filler or caulk needs to be loads.

I am thrilled with how they turned out! They add one other element to the
kitchen that does not scream at you, however does improve the entire look of the
area.
These little tasks layer on each other and are including loads of
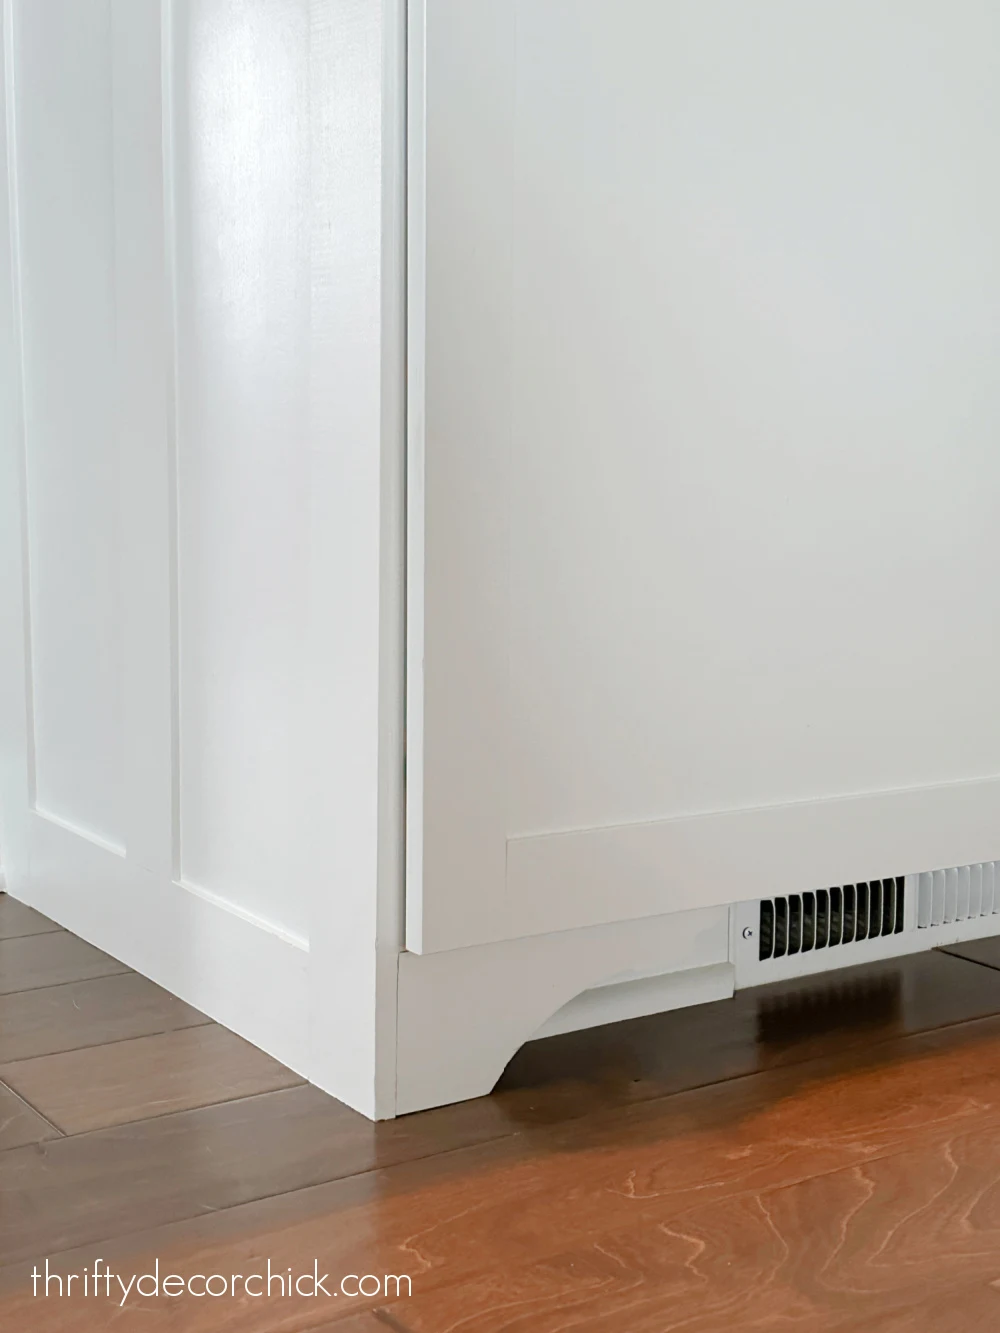
character to our kitchen! Here is how the longer, unique toes seemed:

And here is how they give the impression of being with the less complicated cuts:

You will get both look with these wooden corbels!
I researched a ton of kitchens which have cupboard toes they usually vary from
this less complicated appear like this (simply on the ends) to every cupboard having a
set — so something goes.

Colby looooves to lie in entrance of the vent beneath this cupboard. 🙂
If you’re expert with a jigsaw you
might make inexpensive customized variations of those. I want the thickness of the corbels in comparison with
what I’d make alone. This technique is MUCH faster too.
You possibly can nonetheless do that when you’ve got the usual toe kick on the finish of
your cupboards, however you may wish to add a backing to them that hides that bracket minimize out on the backs. (Pictured above.)
and the softer contact it provides to our kitchen! There are loads of laborious traces
in right here and I needed so as to add some fairly, softer particulars with these curves.